Custom Profiles
Unlike Common and User Profiles, Custom Profiles are only available to the workflow definition in which they are created. A Custom Profile:
- Is automatically created whenever you create a new workflow. The custom profile that is created is copied from the Workflow Designer's default connection profile.
- Can be manually created.
To manually create a Custom Profile
- In a workflow definition's Designer Pane, select a blank area.
- Under
 Connection Profiles in the Properties Pane, click Manage workflow connection profiles.
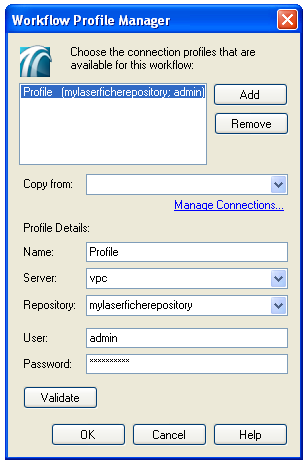
- In the Workflow Profile Manager dialog box, click Add. An empty profile will appear.
- Optional: Next to Copy from, select an existing connection profile to copy connection information from. If you choose to copy from an existing profile, skip to Step 8.
- Optional: Click Manage Connections to create a new Common or User Profile.
- Under Profile Details, specify a name for the new profile.
- Specify a Laserfiche Server, repository, user, and password. The user must have sufficient permissions and access rights (as defined in the Laserfiche Administration Console) to perform all actions that a workflow may call for.
Example: If you add the Assign Template activity to your workflow definition, the user you define must have sufficient rights to assign templates to all entries that the workflow will be performed on
- Click Validate. If the profile created cannot be validated, you will receive an error message.
Deleting Custom Profiles
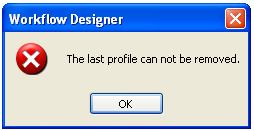
You will be prompted when attempting to delete:
Note: Deleting a custom profile does not delete affect any Common or User profiles.
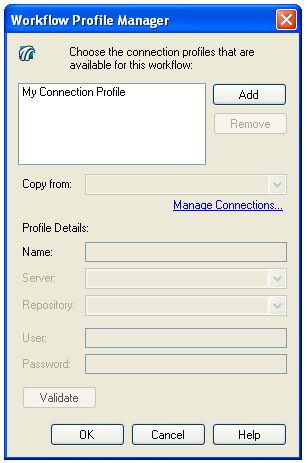
Note: Custom profiles can be deleted in the Workflow Profile Manager by selecting the profile and clicking Remove.